iView 3500STBIII ATSC Digital Converter Box User Manual
Download PDF user manual for iView 3500STBIII ATSC High Definition Digital Terrestrial Receiver with PVR and Media Player (EN|ES) 28 pages zip
Description
This PDF user manual is for the iView 3500STBIII atsc digital converter box.
About the Item
iView 3500STBIII ATSC High Definition Digital Terrestrial Receiver
Are you still holding on to your old analog TV? It’s quite functional and working perfectly fine, so an upgrade isn’t called for. Iview offers a practical and economical solution to households that rely on OTA broadcasts. Did you know you can tune in to basic stations for free? No strings attached, and by strings, we mean a set-top box and monthly subscriptions. By getting an iView digital converter box, you won’t have to replace your beloved analog TV. You may even get to see the local feeds in glorious HD!
The iView Digital Converter box automatically converts the signal to be compatible with your analog unit. Analog TV owners won’t need to get themselves a new TV if they don’t want to. The tuner box comes in with input holes for both analog and newer-type TVs.
The iView 3500STBIII has a built-in QAM tuner and supports Over-the-Air (OTA), which allows the user to receive some unencrypted digital cable channels, also known as “in-the-clear” channels. You can finally watch TV without needing additional set-top boxes or a monthly cable subscription.
Our iView 3500STBIII has passthrough capabilities via firmware to access analog channels in countries and areas where analog signals are still present. You can rely on the iView 3500STBIII to acquire the transmission and play it directly to your television set. Analog channels will still be accessible due to our converter boxes’ pass-through capability. Broadcasting is still alive and well, even in your old TV.
The iView 3500STBIII is not your ordinary converter box. It’s the ultimate entertainment hub! Ease of use, the comfort, and convenience it brings are awesome features that simplify life. Unbridled multi-media experiences, including video recording and playback, high definition luxury, backed by financial savings only make it even better. Cut out your expensive cable bills and upgrade your converter box to the very affordable iView 3500STBIII.
To ensure that this product works in peak performance, please read the USER MANUAL carefully before operating the device.
Read, follow and keep these instructions.
Document(s) available
(PDF) USER MANUAL
Available languages
ENGLISH (EN) | ESPAÑOL (ES)
SUMMARY OF CONTENTS
FCC Notice
Important Safety Instructions
Precautions: Please read the precautions before operating this unit.
Introduction
Main Functions and Features
Remote Control guide:
– Keys List
– Instructions for programming the Learning Buttons
– Installing the Batteries (2 x AAA 1.5V batteries). About batteries. Caution.
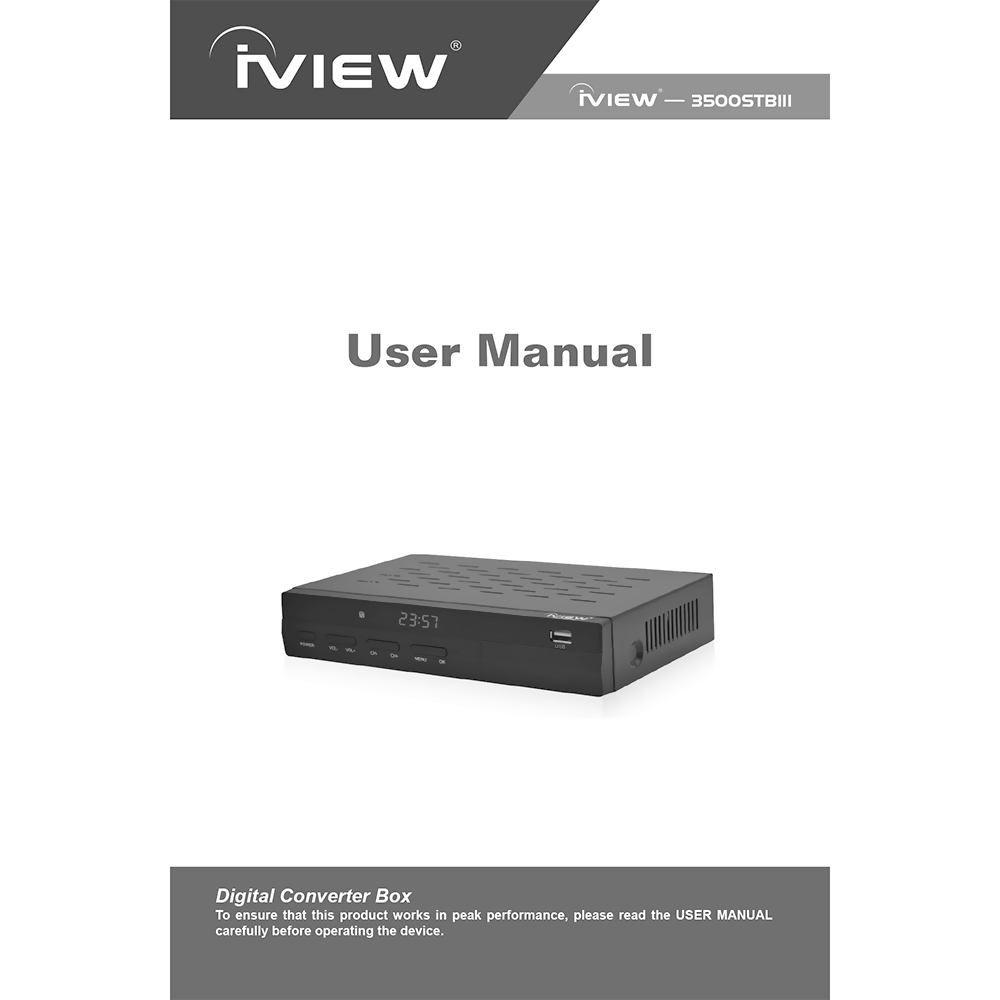
Front Panel: Buttons, LED display, and ports
Rear Panel: RF in / RF put, Digital audio output, HDMI output with HDCP (version 1.3), Composite video output, Component video output, Analogue audio output, Power input.
Installation:
– Connecting the Receiver to a TV using RF (Coax) Cable
– Connecting the Receiver to a TV using HDMI (default output video source: HDMI)
– Connecting the Receiver to a TV using provided RCA component cable (default output mode: Video, AV, Cable or Input)
Installation Guide:
If this is the first time that you will use this converter box, or you have restored the unit to the Factory Default, the Installation Guide screen will appear on your TV screen.
Follow the instructions on the Installation Guide to select preferences on Language, Country and start the Channel Search.
MENU
MAIN MENU: Most functions are available in main menu.
Press the MENU key on the remote control; you can access the Main MENU. There are 7 items for set up.
Use the LEFT and RIGHT Volume keys to navigate through the Menu tabs. Select the desired option and press the OK key. Use the Up and Down CH Arrow keys to navigate the settings for each Menu Tab. Settings that have multiple options will have left and right yellow arrows. Navigate the options using the Left and Right Volume keys. Choose your selection and press the Exit key. Press the EXIT key again to exit the main menu.
1. PROGRAM submenu
– Program Edit – You can edit programs, check TV Program Guide, sort channels and set LCN from the Program Settings.
– EPG – On-screen TV guide that shows the scheduled programs up to 24 hours in advance for every tuned channel. Press the EPG key on the Remote Control to access the Electronic Program Guide.
– Sort – allows you to sort the channels by different methods: By LCN: This will sort the channels by ascending order; By Service Name: This will sort the channels in alphabetical order; By Service ID: This will sort the channels by Service ID; By ONID: This will sort the channels according to the ONID.
2. PICTURE submenu
The Picture option allows you to set different functions such as:
a) Aspect ratio: Video Aspect Ratio can be 4:3 (also known as Anamorphic Image) or 16:9 (also known as Widescreen TV). Press the MENU button and select the Aspect Ratio setup Menu. If you have a Standard Definition TV, select 4:3 Aspect Ratio. If you have a high definition TV, select 16:9 Aspect Ratio.
b) Resolution: You can choose different resolutions according to your TV: 480i Coax Cable, 480p, 720p RCA cable, 1080p or 1080i for HDMI TV.
c) TV Format: PAL / NTSC
3. CHANNEL SEARCH submenu
a) Auto Search: This option will automatically search for TV and Radio channels and save them once the scanning is completed. All previously saved channels and settings will be deleted.
b) Manual search: This option allows you to scan for new channels without deleting previously saved channels and settings.
c) Country – Choose the country of your residence
d) Antenna Power – On or Off
e) Signal Type – Antenna use AIR; Cable use CABLE
f) Modulation – Choose CH3 or CH4 or OFF.
4. TIME submenu. It allows you to set:
a) Time Offset: Select auto or manual for GMT offset adjustments.
b) Country Region: Select the Country Region when [Time Offset] is set to AUTO.
c) Time Zone: Select the Time Zone offset when [Time Offset] is set to MANUAL.
d) Sleep: Select the desired time for the Auto-shut off function (from 1 hour to 12 hours or set to Off).
e) Power On/Off
f ) Hour System: 12 Hours Systems or 24 Hours Systems
5. OPTION submenu
The menu contains the following options:
a) OSD Language: Change the ON Screen Display language.
b) Close Caption: Select the subtitle language.
c) Audio Language: If the program has multi-languages, set your preference here.
d) Digital Audio: PCM, etc.
6. SYSTEM submenu
The menu contains the following options:
a) Parental Guidance: The options for setting up the age preference start from 4 years old to 18 years old.
b) Set Password: It allows you to modify the default password, which is “000000”.
c) Restore Factory Default: It allows you to restore the unit to its default factory settings. This function will delete all saved channels and personal settings.
d) Information: You can check the software version and hardware version of your unit.
e) Software Update: USB Upgrade – Requires USB Device
f ) Daylight Time: Off or On
7. USB submenu
a) Multimedia: While on TV Mode, press the “USB” button to access the Multimedia menu. The menu contains 4 different icons: Music, Photo, Movie, and PVR.
b) Photo Configure – Adjust the slide time, slide mode and aspect ratio here
c) Movie Configure – Subtitle Specific (Normal, Big, Small); Subtitle BG (Gray, YellowGreen, White, Transparent); Subtitle Font Color (White, Black, Red, Blue, Green)
d) PVR Configure – Recording Device. View the information of your connected USB storage device which includes Format Type, Total and Free Space available on the drive. Select FORMAT to format the USB compatible device in FAT 32 or NTFS format.
The USB port, found on the front of the device, is also used to perform the Software Update.
DAILY USE
INFO (Yellow Key): Press the “INFO” key to display the Information banner while viewing TV shows.
AUDIO: Some programs may have multilingual audio language and this audio broadcast may be on a different audio mode such as Stereo, Left or Right. All the available audio languages will be displayed on the audio track window when you press the AUDIO key.
CC (Closed Caption): Certain programs have multilingual subtitle information. All available subtitles languages will be displayed in the subtitle information window when you press the CC key.
PREV/NEXT & FR/FF: can be used during playback multimedia programs from your external USB device.
EPG: Press EPG Key to display Electronic Program Guide on the screen. This displays EPG up to 24 hours for all programs being broadcasted from all broadcast stations.
Favourite Channel.
– Setting up Favorite TV or Radio Channels: You can add preferred channels to a Favorite Channels List.
– Disable Favorite TV or Radio Channels
– View Favorite Channels: While in normal viewing mode, press the “FAV” key to access to your favorite channel menu.
– Delete a Radio or TV Program
– Skip TV or RADIO Channel
– Move a Radio or TV Program
PVR FUNCTION
The PVR function allows you to record and play your favorite programs recorded. Instant Recording, Electronic Program Guide Timer Recording is all available. To use various functions, such as the PVR Function, Instant Recording Function, TV Program Guide Timer Recording Function, Timeshift Function, Playback of Recorded Program Function, and Multi-Media Player Function, it is necessary to connect a USB flash drive or an external hard disk to the USB port of the converter box. The maximum capacity of HDD supported by 3500STBIII is up to a size of 4 Terra Bytes (TB).
Please note that due to the buffer speed requirement, some USB flash drives may not be compatible for use with the Timeshift function.
3500STBIII supports FAT 32 and NTFS file formats.
– Instant Recording: Press the REC (Red Key) to start instant recording of the TV program currently being viewed. The recording symbol would be displayed in the top left of the screen.
– Electronic Program Guide Timer Recording: You will never miss any of your favorite programs again with the Electronic Program Guide recording feature.
– Rename Recording
– Recording Adjustments
– Timeshift: The TIMESHIFT function allows you to pause the TV program being viewed. Once paused, the TV program that is paused is being stored on your connected USB Hard Drive or Flash Drive.
– Multimedia Player
– Format Portable Hard Disk
TROUBLESHOOTING:
Power on, but nothing displayed on screen.
– Unit not turned on at main switch.
TV picture drops out and the unit displays “No signal”.
– Antenna is not properly connected or you are in a bad reception area.
Receiving digital TV but missing some channels.
– Antenna is not properly connected or you are in a bad reception area.
Remote is not working.
– Batteries are dead or there is interference.
How to clean iView 3500STBIII digital converter box?
A password will be required when modifying advanced options in the Menu.
The default password is 000000.
INSTRUCTIONS for Converter Box Firmware Upgrade
Why download the Manual?
This user manual provides all the information from IVIEW about the model 3500STBIII digital converter box, as detailed in the table of contents. Reading it completely will address most questions you might have. You can download and save it for offline use, including viewing it on your device or printing it for your convenience if you prefer a paper version.
How to download the Manual?
Download it by clicking the button below
Helped you out?
Glad to hear that. It would be awesome if you could . . .


